
Sumo Logic Integration Guide
Sumo Logic is a log management and analytics service that leverages machine-generated big data to deliver real-time IT insights. It makes it easier to identify issues in complex applications and systems. TaskCall's Sumo Logic integration further enhances its capability by effectively increasing the visibility of the errors discovered by Sumo Logic and dispatching their information to the correct on-call responders for real-time troubleshooting.
Pointers
- The integration is between a TaskCall service and Sumo Logic.
- This integration only allows alerts to be received in TaskCall from Sumo Logic.
- TaskCall automatically groups repeating alerts from the same Sumo Logic view into one incident.
In TaskCall
- Go to Configurations > Integrations and click New Integration.
- Select the Sumo Logic integration.
- Give the integration a name and configure how incidents will be created. Only the Default Service field is required. The rest are optional.
- Incidents (Optional)
- TaskCall automatically maps incoming payloads with internal attributes to create incidents. However, this can be customized in the Incidents tab. Constant values can be included alongside placeholders to dictate which attributes should map to the Incident Title, Description, Tags, Snapshots and Vendor URL. To insert a placeholder use double curly braces.
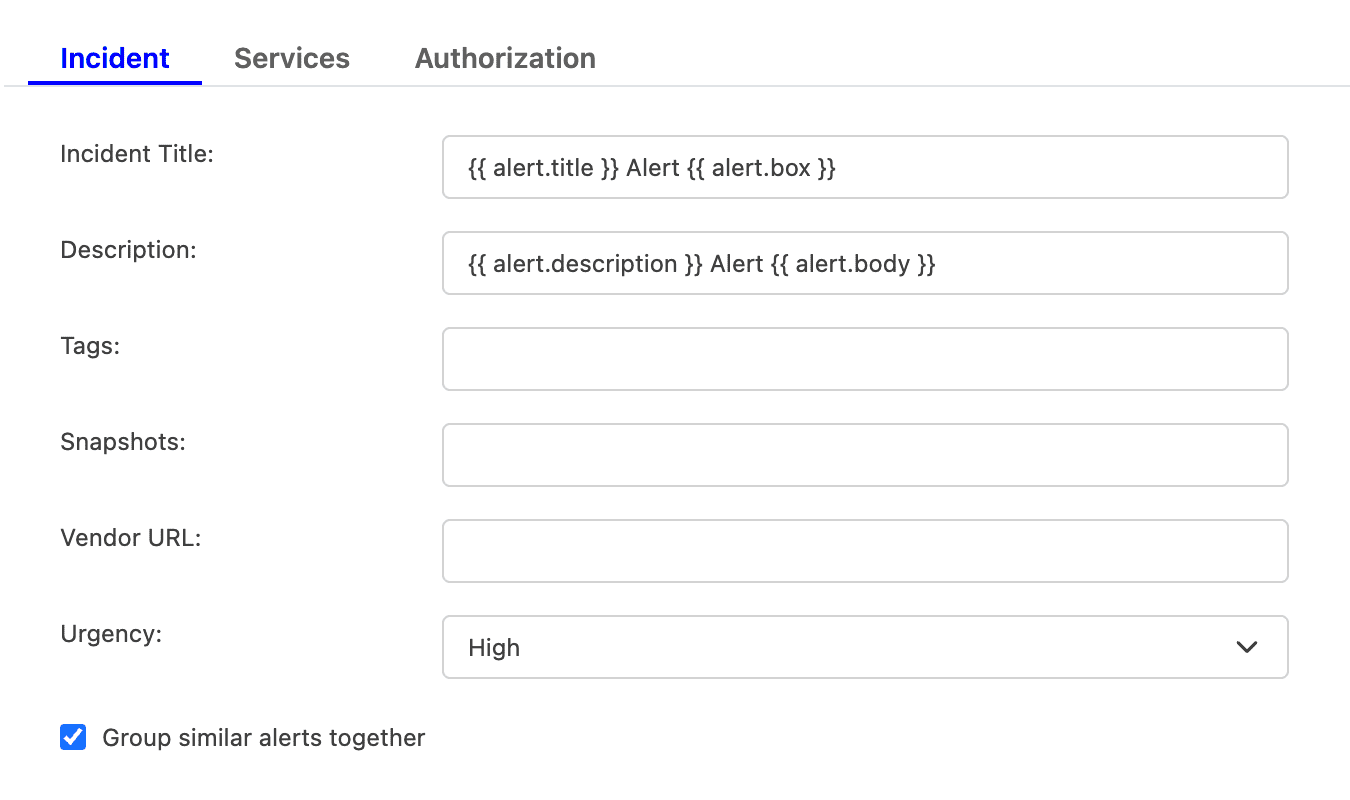
For example, if you enter {{ alert.title }} in the Incident Title field, TaskCall will look for an attribute called "title" nested inside another attribute called "alert" in the incoming payload. If the nested attribute exists, its corresponding value will be pulled from the payload and inserted. If the nested attribute does not resolve successfully, TaskCall will fall back to the default mapping.
If you are unsure, please leave the fields empty. TaskCall will use the default mapping to create the incident for you. - Select the Urgency level the incident should be created at.
- Select the option to Group similar alerts together if you would like follow up triggers from the same alert source to be grouped into the same incident. If you leave this option unchecked, then a new incident will be created for every trigger. (This behavior is specific to new triggers; not updates to an alert.)
- Click Next to move on to the Services tab.
- TaskCall automatically maps incoming payloads with internal attributes to create incidents. However, this can be customized in the Incidents tab. Constant values can be included alongside placeholders to dictate which attributes should map to the Incident Title, Description, Tags, Snapshots and Vendor URL. To insert a placeholder use double curly braces.
- Services (Required)
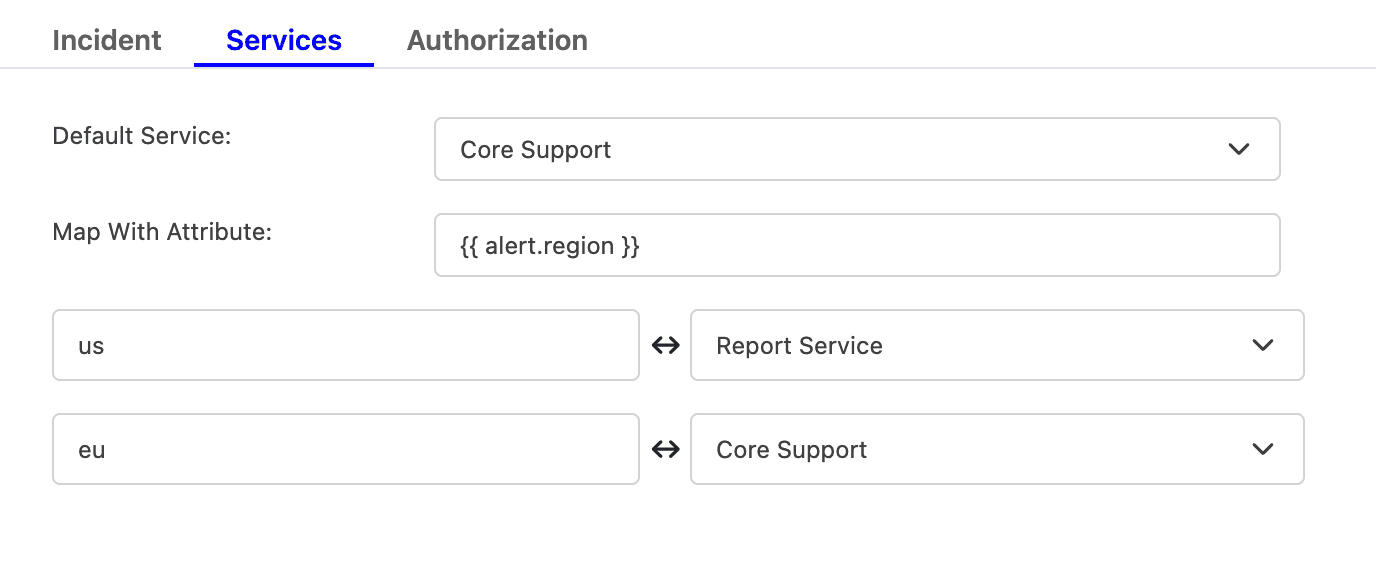
- Select the Default Service incidents should be sent to. To route incidents to different services instead, set Map With Attribute to the attribute to route by using a placeholder. Then, map each value it can take to the service that should receive it.
For example, to route by a region attribute sent in the payload, set Map With Attribute to {{ region }}, then map US to one service and EU to another, and so on.
- Click Next to move on to the Authorization tab.
- Select the Default Service incidents should be sent to. To route incidents to different services instead, set Map With Attribute to the attribute to route by using a placeholder. Then, map each value it can take to the service that should receive it.
- Authorization (Optional)
- The Authorization tab allows a Bearer Token and an IP Allowlist be added if you would like to restrict who is able to send alerts to this integration. If you are unsure, this can be skipped.
- Once done, click Save.
- Copy the Integration Url that is issued for the integration. This will be used to set up the notification in Sumo Logic.
In Sumo Logic
- Go to Alerts > Connections. Click the plus button on the right corner.

- Select the Webhook option.
- In the form that is shown, name the webhook TaskCall and paste the Integration Url you copied over from TaskCall in the URL section. Then copy and paste the below JSON in the Payload section.
{
"name": "{{Name}}",
"description": "{{Description}}",
"id": "{{Id}}",
"monitor_type": "{{MonitorType}}",
"query": "{{Query}}",
"query_url": "{{QueryURL}}",
"results_json": "{{ResultsJson}}",
"num_query_results": "{{NumQueryResults}}",
"trigger_time_range": "{{TriggerTimeRange}}",
"trigger_time": "{{TriggerTime}}",
"trigger_condition": "{{TriggerCondition}}",
"trigger_value": "{{TriggerValue}}",
"severity": "Medium"
}

Note that the "severity" attribute is constant. You can change that if you need to control the uregncy in TaskCall. Available values are - Minor, Low, Medium, High, Critical.
- Click Save when you are done.
- The TaskCall webhook is now ready to be used on Saved Searches and Monitors. Here we will show you how to use it in Saved Searches.
- Go to your desired saved search screen and click Save As. (If you were creating a monitor, then you would have clicked Add Monitor)

- Give the search a name, give it a description and set the time range. Click Schedule this search .

- Set the alerting conditions as per your need. Set the Alert Type to Webhook and select TaskCall (the webhook you created earlier) as the Connection.

- Click Save.
- Done! You will be now receiving alerts from Sumo Logic in TaskCall for this search whenever it breaches your set condition.