
ServiceDesk Plus Integration Guide
ManageEngine ServiceDesk Plus is a comprehensive ITSM platform. It allows enterprise-level ticket and asset management that eases the workflow for IT teams. TaskCall integrates with ServiceDesk Plus allows important tickets to be prioritized by engaging the correct on-call responders through on-call management software and various channels of notifications. Further verifications and checks can be executed automatically to enhance the ticket resolution process. The integration not only enables teams to address important issues urgently, but also meets their SLAs.
Pointers
- The integration is between a TaskCall service and ManageEngine ServiceDesk Plus.
- This integration only receives alerts in TaskCall from ManageEngine ServiceDesk Plus.
- Incidents will be automatically acknowledged and resolved in TaskCall when the corresponding ticket in ServiceDesk Plus is updated.
In TaskCall
- Go to Configurations > Services . Select the service you want to integrate with.
- Once you are on the Service details page, go to the Integrations tab. Click on New Integration.
- Give the integration a name.
- From the integration types, select the top radio button indicating that you are trying to use a built-in integration.
- From the list of built-in integrations, select ManageEngine ServiceDesk Plus.
- Click Save.
- Copy the Integration URL that is issued for the integration.
In ManageEngine ServiceDesk Plus
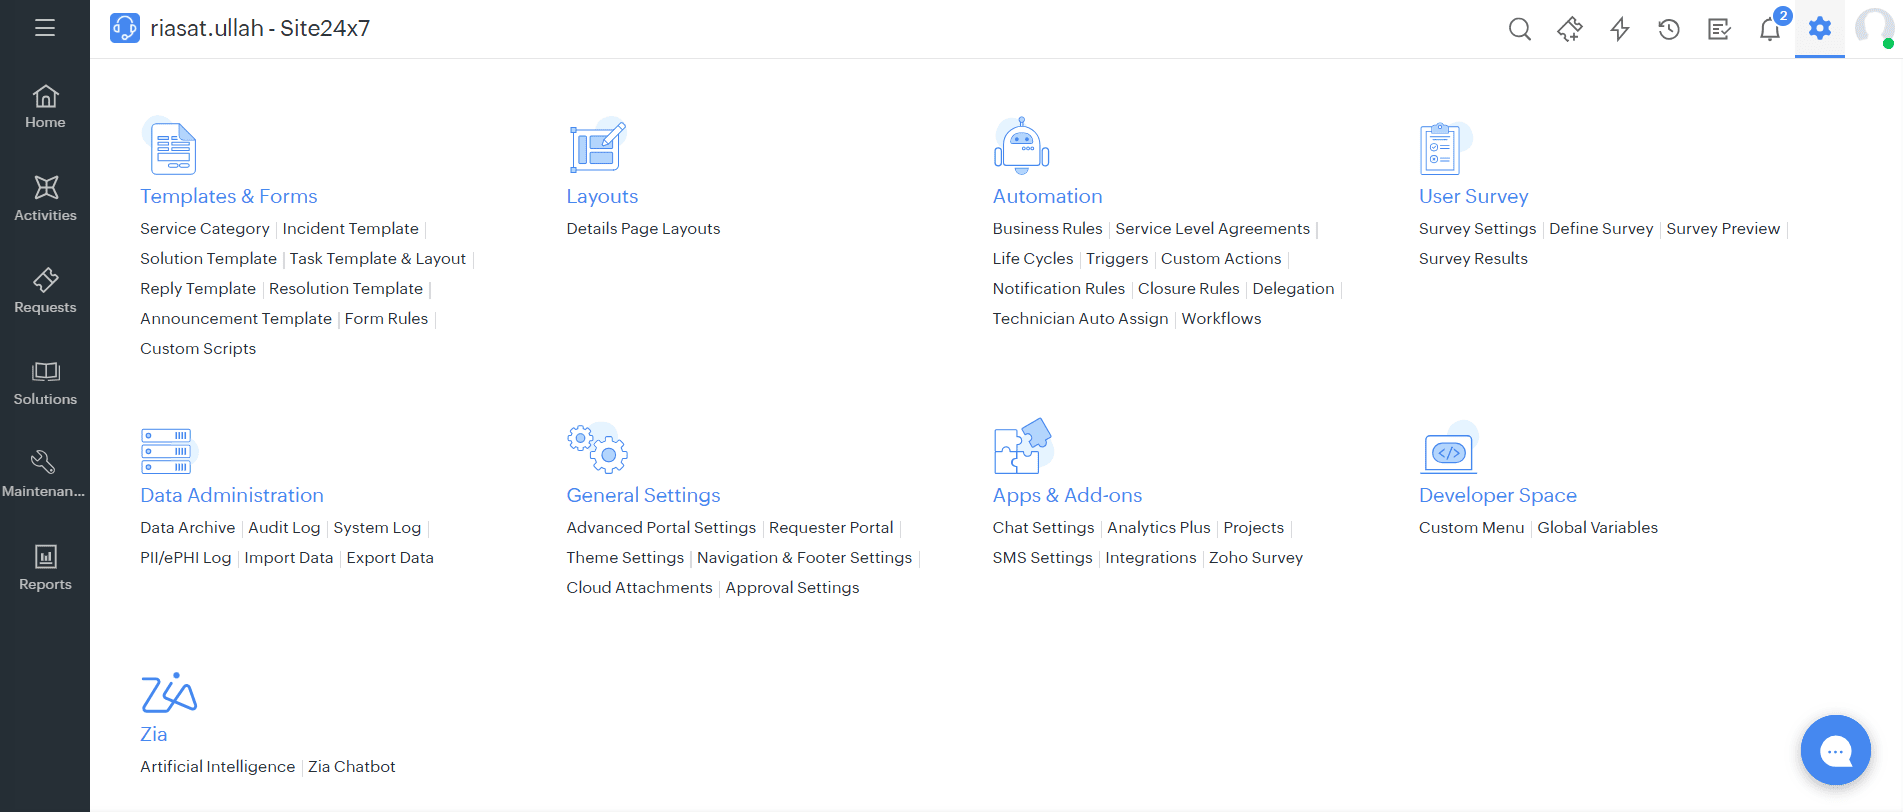
- Log in to your ManageEngine ServiceDesk Plus account. Click on Setup icon on the top right corner. From the options that are displayed, select Automation.
- First, you will have to create a webhook. Select Custom Actions > Webhooks > New Webhook.
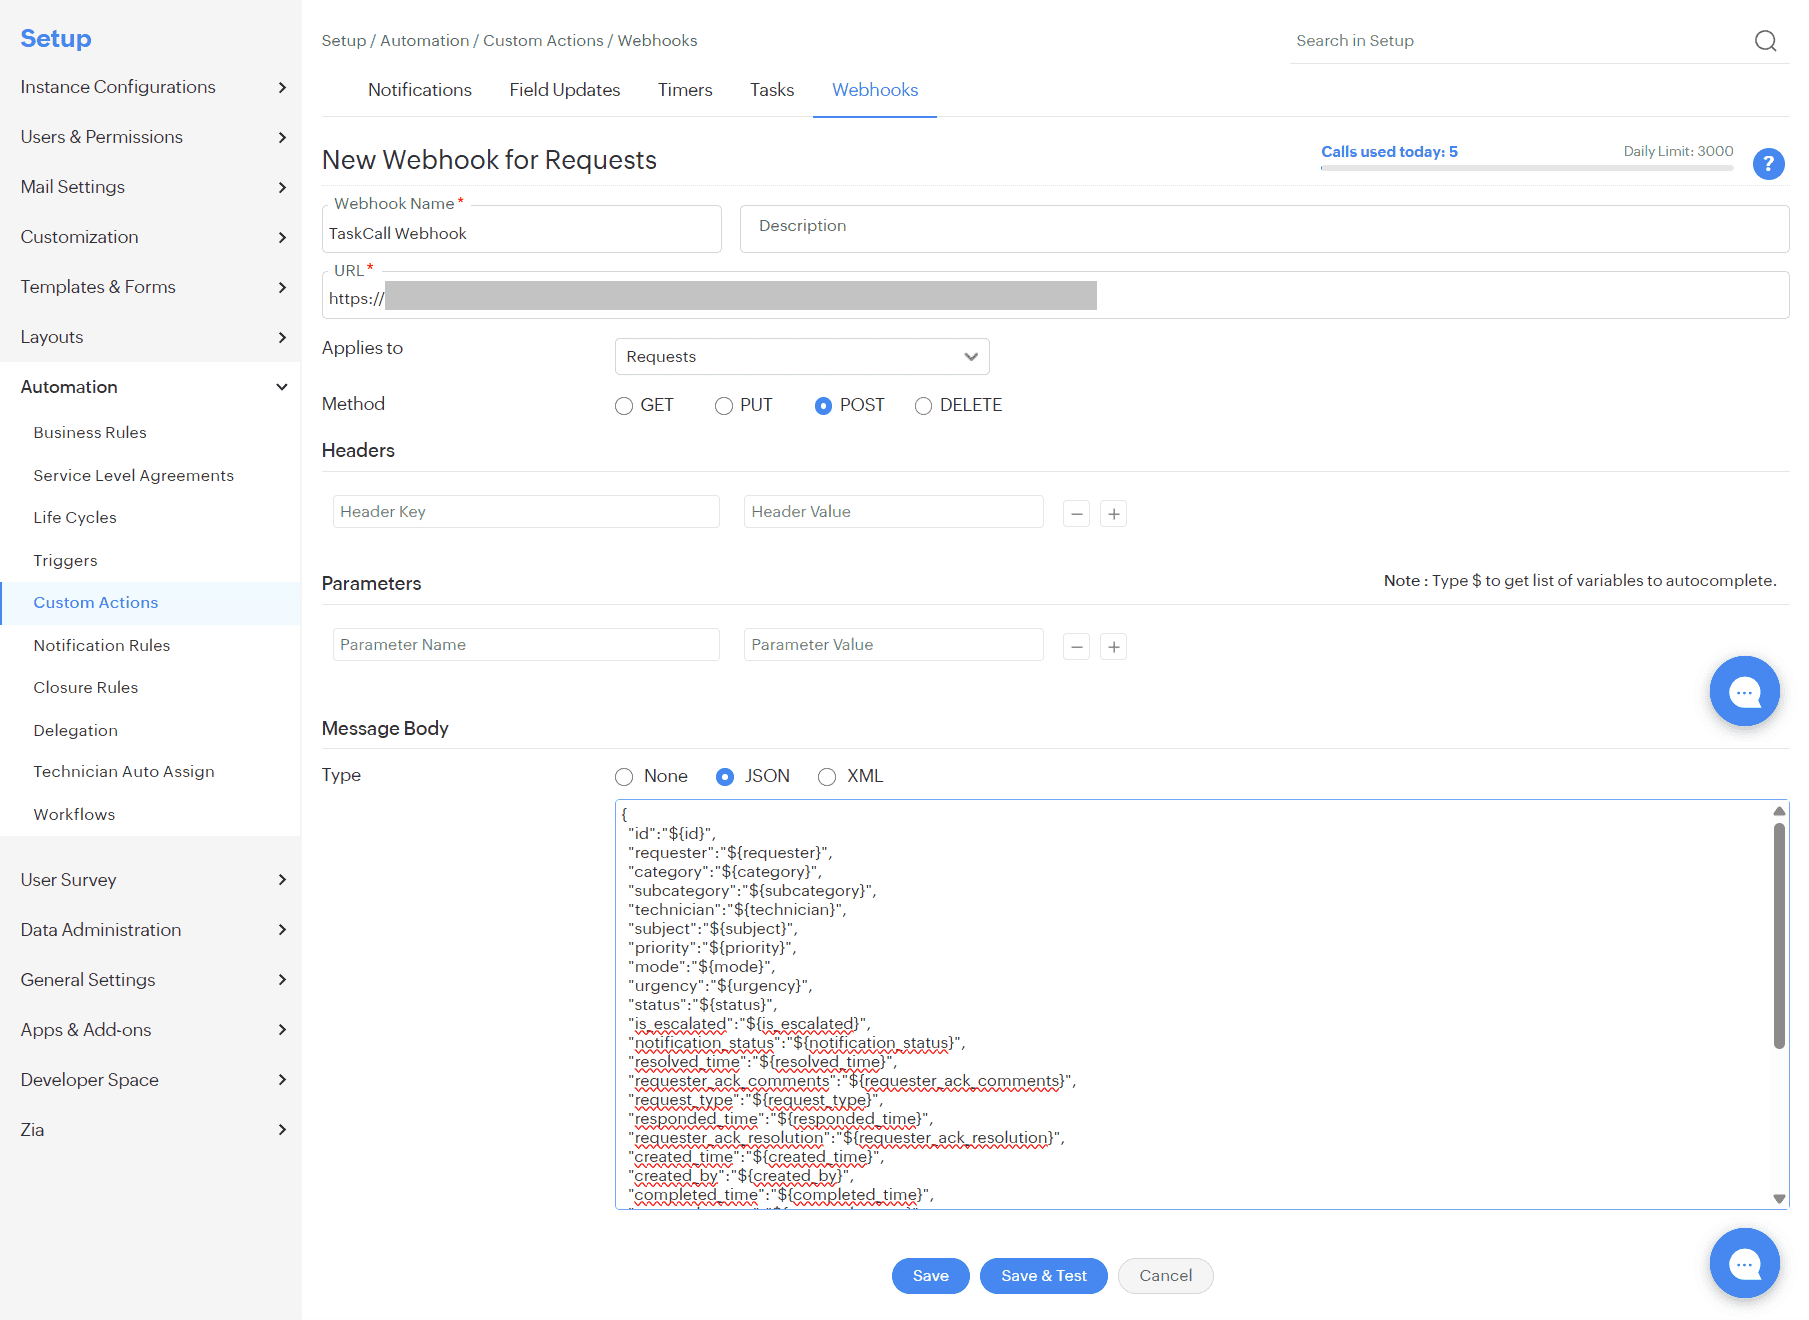
- Give the webhook a name.
- Paste the Integration URL you copied over from TaskCall in the URL field.
- Set it to apply for Requests.
- Set the method as POST.
- Set the message body to be JSON. Copy and paste the following payload as the JSON body.
{
"id":"${id}",
"requester":"${requester}",
"category":"${category}",
"subcategory":"${subcategory}",
"technician":"${technician}",
"subject":"${subject}",
"priority":"${priority}",
"mode":"${mode}",
"urgency":"${urgency}",
"status":"${status}",
"is_escalated":"${is_escalated}",
"notification_status":"${notification_status}",
"resolved_time":"${resolved_time}",
"requester_ack_comments":"${requester_ack_comments}",
"request_type":"${request_type}",
"responded_time":"${responded_time}",
"requester_ack_resolution":"${requester_ack_resolution}",
"created_time":"${created_time}",
"created_by":"${created_by}",
"completed_time":"${completed_time}",
"approval_status":"${approval_status}",
"scheduled_time":"${scheduled_time}",
"service_category":"${service_category}",
"site":"${site}",
"deleted_time":"${deleted_time}",
"display_id":"${display_id}",
"due_by_time":"${due_by_time}",
"first_response_due_by_time":"${first_response_due_by_time}",
"group":"${group}",
"has_notes":"${has_notes}",
"department":"${department}",
"description":"${description}"
}
- Click Save when you are done. You can also click Save & Test to ensure the payload has been configured correctly.
Vendor Ticket URL
If you like the ticket URL to be accessible from TaskCall, you can pass in the "vendor_incident_url" attribute in the payload. You will have to construct the URL yourself and send it as the value of the attribute. For cloud instances, the following format will work as the value: https://sdpondemand.manageengine.in/app/itdesk/ui/requests/${id}/details.
- Next, you will need to create a trigger to automatically execute the webhook when a ticket is created and updated. Select Triggers > New Trigger.
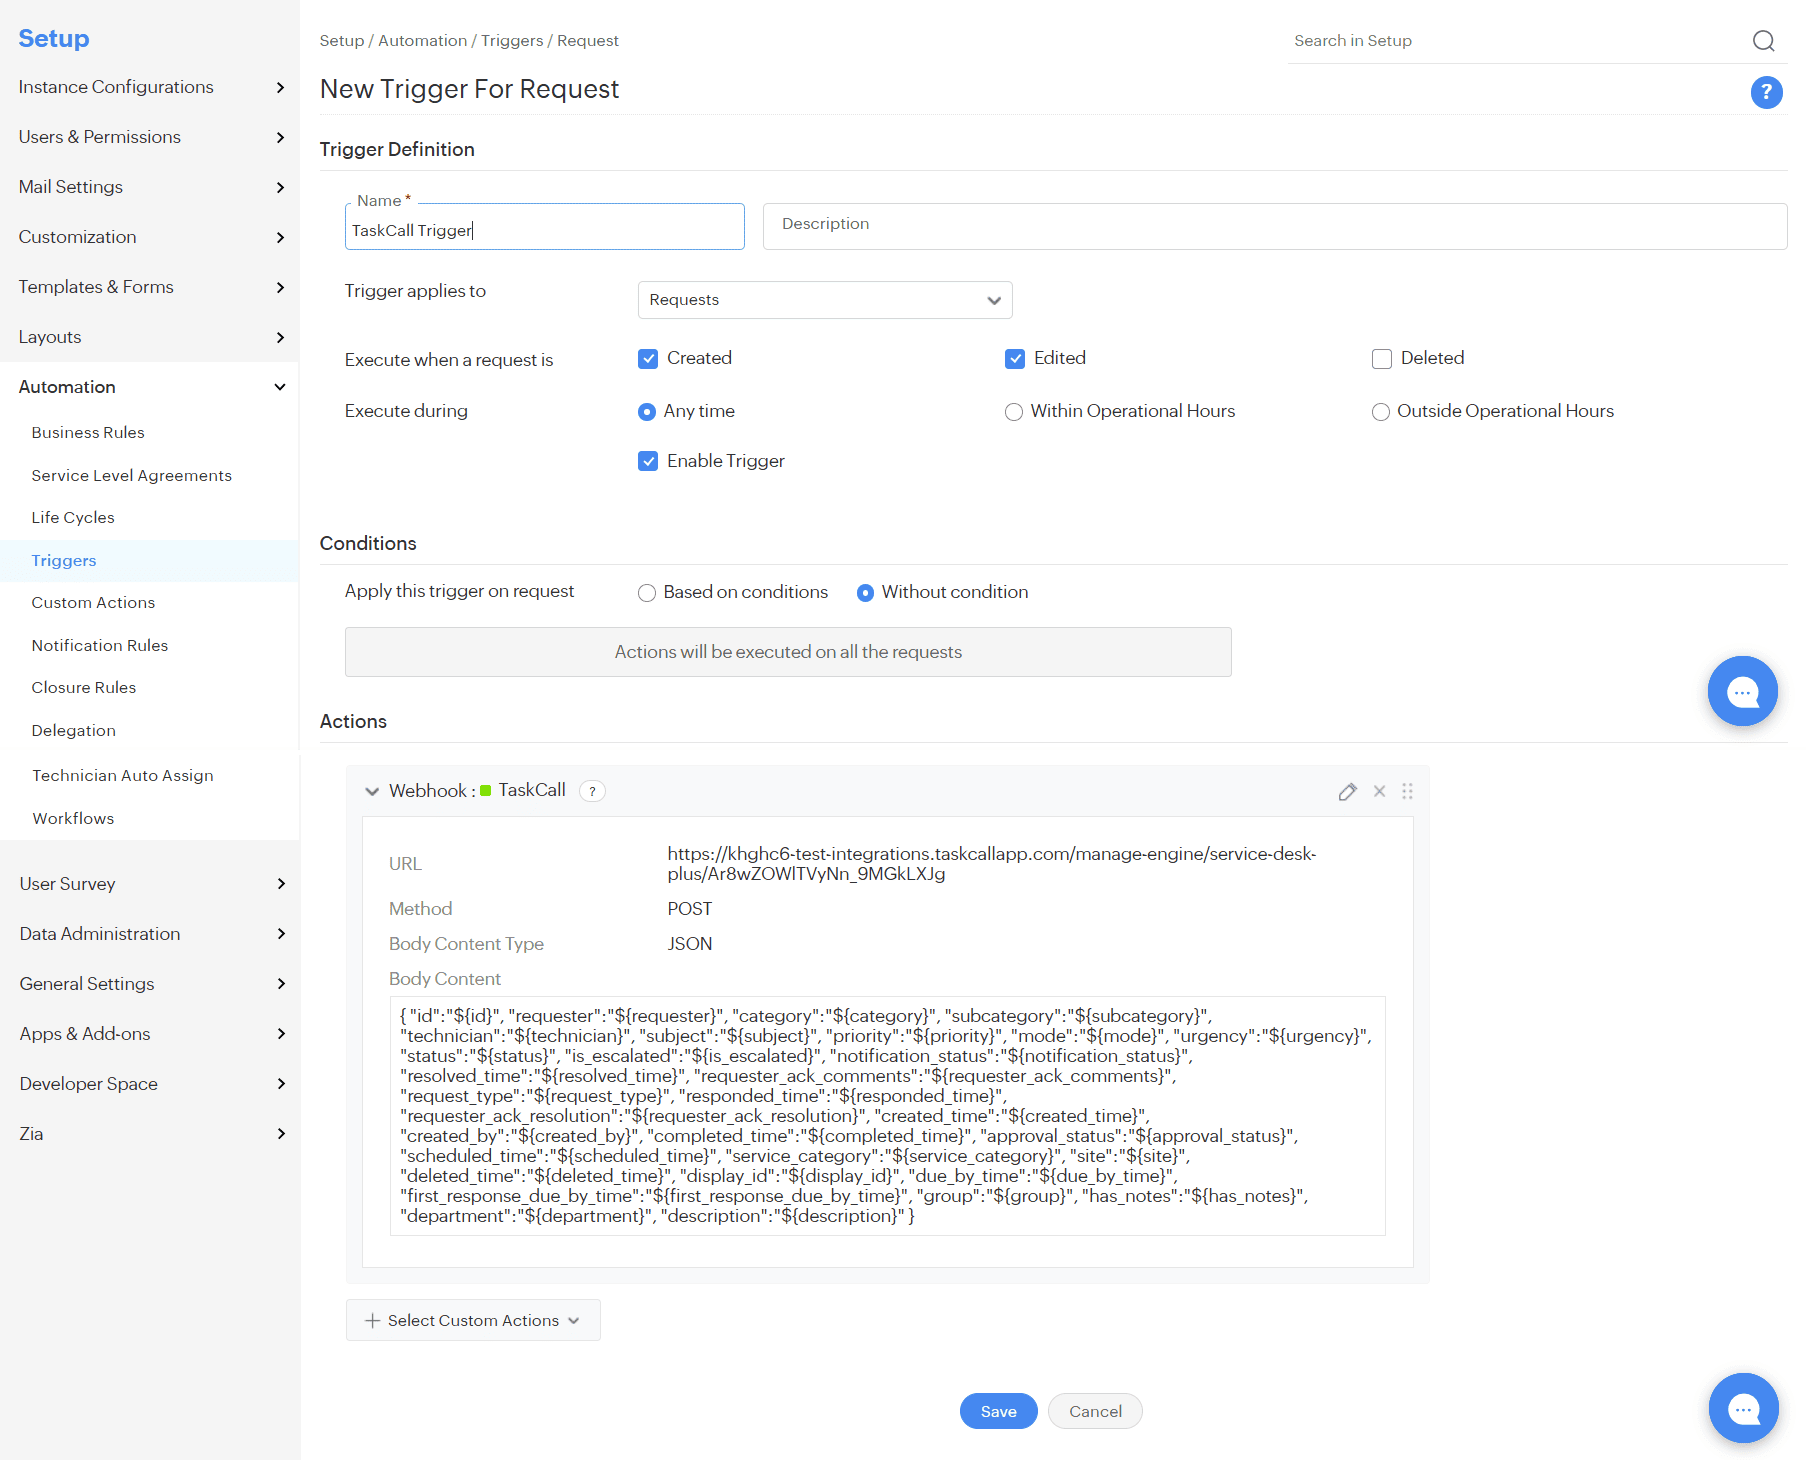
- Give the trigger a name. Let it apply only on Requests and execute when a request is Created and Edited.
- You can define conditions for the trigger or you can let it apply to all tickets without any conditions.
- Select the webhook you created in the last step as the action.
- Click Save.
That's it! Your ManageEngine ServiceDesk Plus integration is ready to use.