External Status Pages Setup Guide
TaskCall External Status Pages allow organizations to effectively communicate with their public or external stakeholders about system issues. Stakeholders can now stay informed about system health through publicly hosted status pages and subscribing to updates from them. Besides giving an overview of service uptime, they also provide details of ongoing incidents and how they are being handled. This reduces the number of inquiries received by customer support teams and interruptions faced by DevOps teams.
TaskCall Status Pages also eliminate the need for support teams to switch between different platforms to handle system and public incidents. It acts as a single source of truth by connecting system incidents with public incidents and automatically syncing them up. This saves precious minutes and allows teams to stay rooted to their primary task of resolution while keeping stakeholders informed effortlessly.
Create an External Status Page
TaskCall Status Pages allow you to customize the information, the design and the Business Services that get displayed on it. Give it a feel of your own organization theme and colors, and the view you want your audience to have. You can also restrict post and edit permissions to have better control over the page.
To create an external status page:
- Go to ITSM > External Status Pages. Click New Status Page.
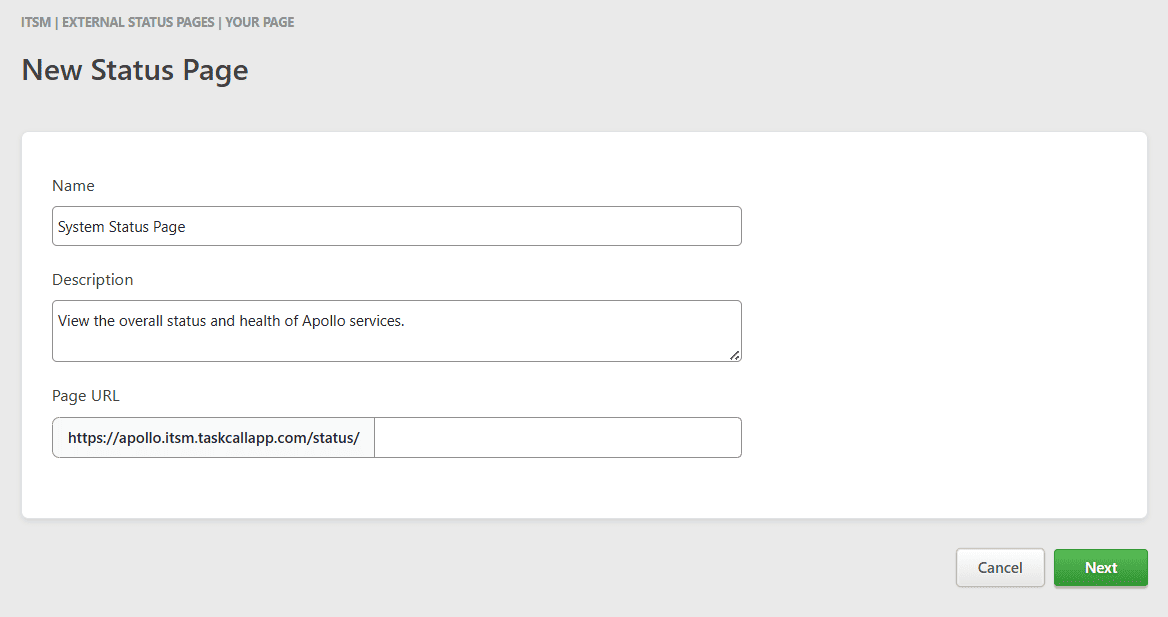
- Provide basic information about the page.
- Give the status page a name.
- Describe what it is for. The is a required field as it will be used as the meta description for the page.
- Define the URL of your status page. This is the URL the status page will be available on. By default, the URL in the EU data center region is https://{subdomain}.itsm.taskcallapp.com/status, and https://{subdomain}.itsm.us.taskcallapp.com/status in the US region, where {subdomain} is the subdomain you registered your TaskCall account with. The URL can be customized by adding an extension. For example, https://apollo.itsm.taskcallapp.com/status/management-systems.
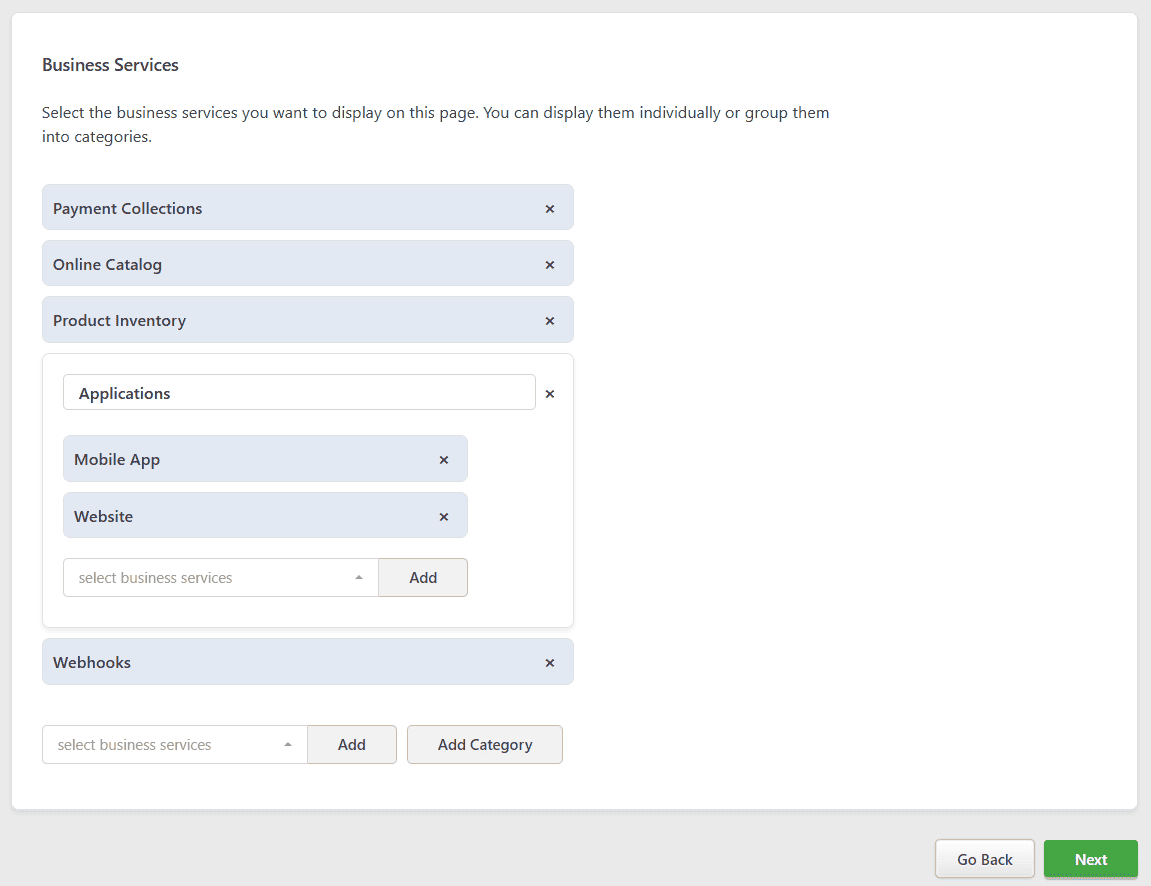
- Select the business services that should be shown on the page.
In the next section, select the business services that should be shown on the page. You can put them into categories as well. Business services in the same category are grouped together. They are displayed in the same order they are added here.
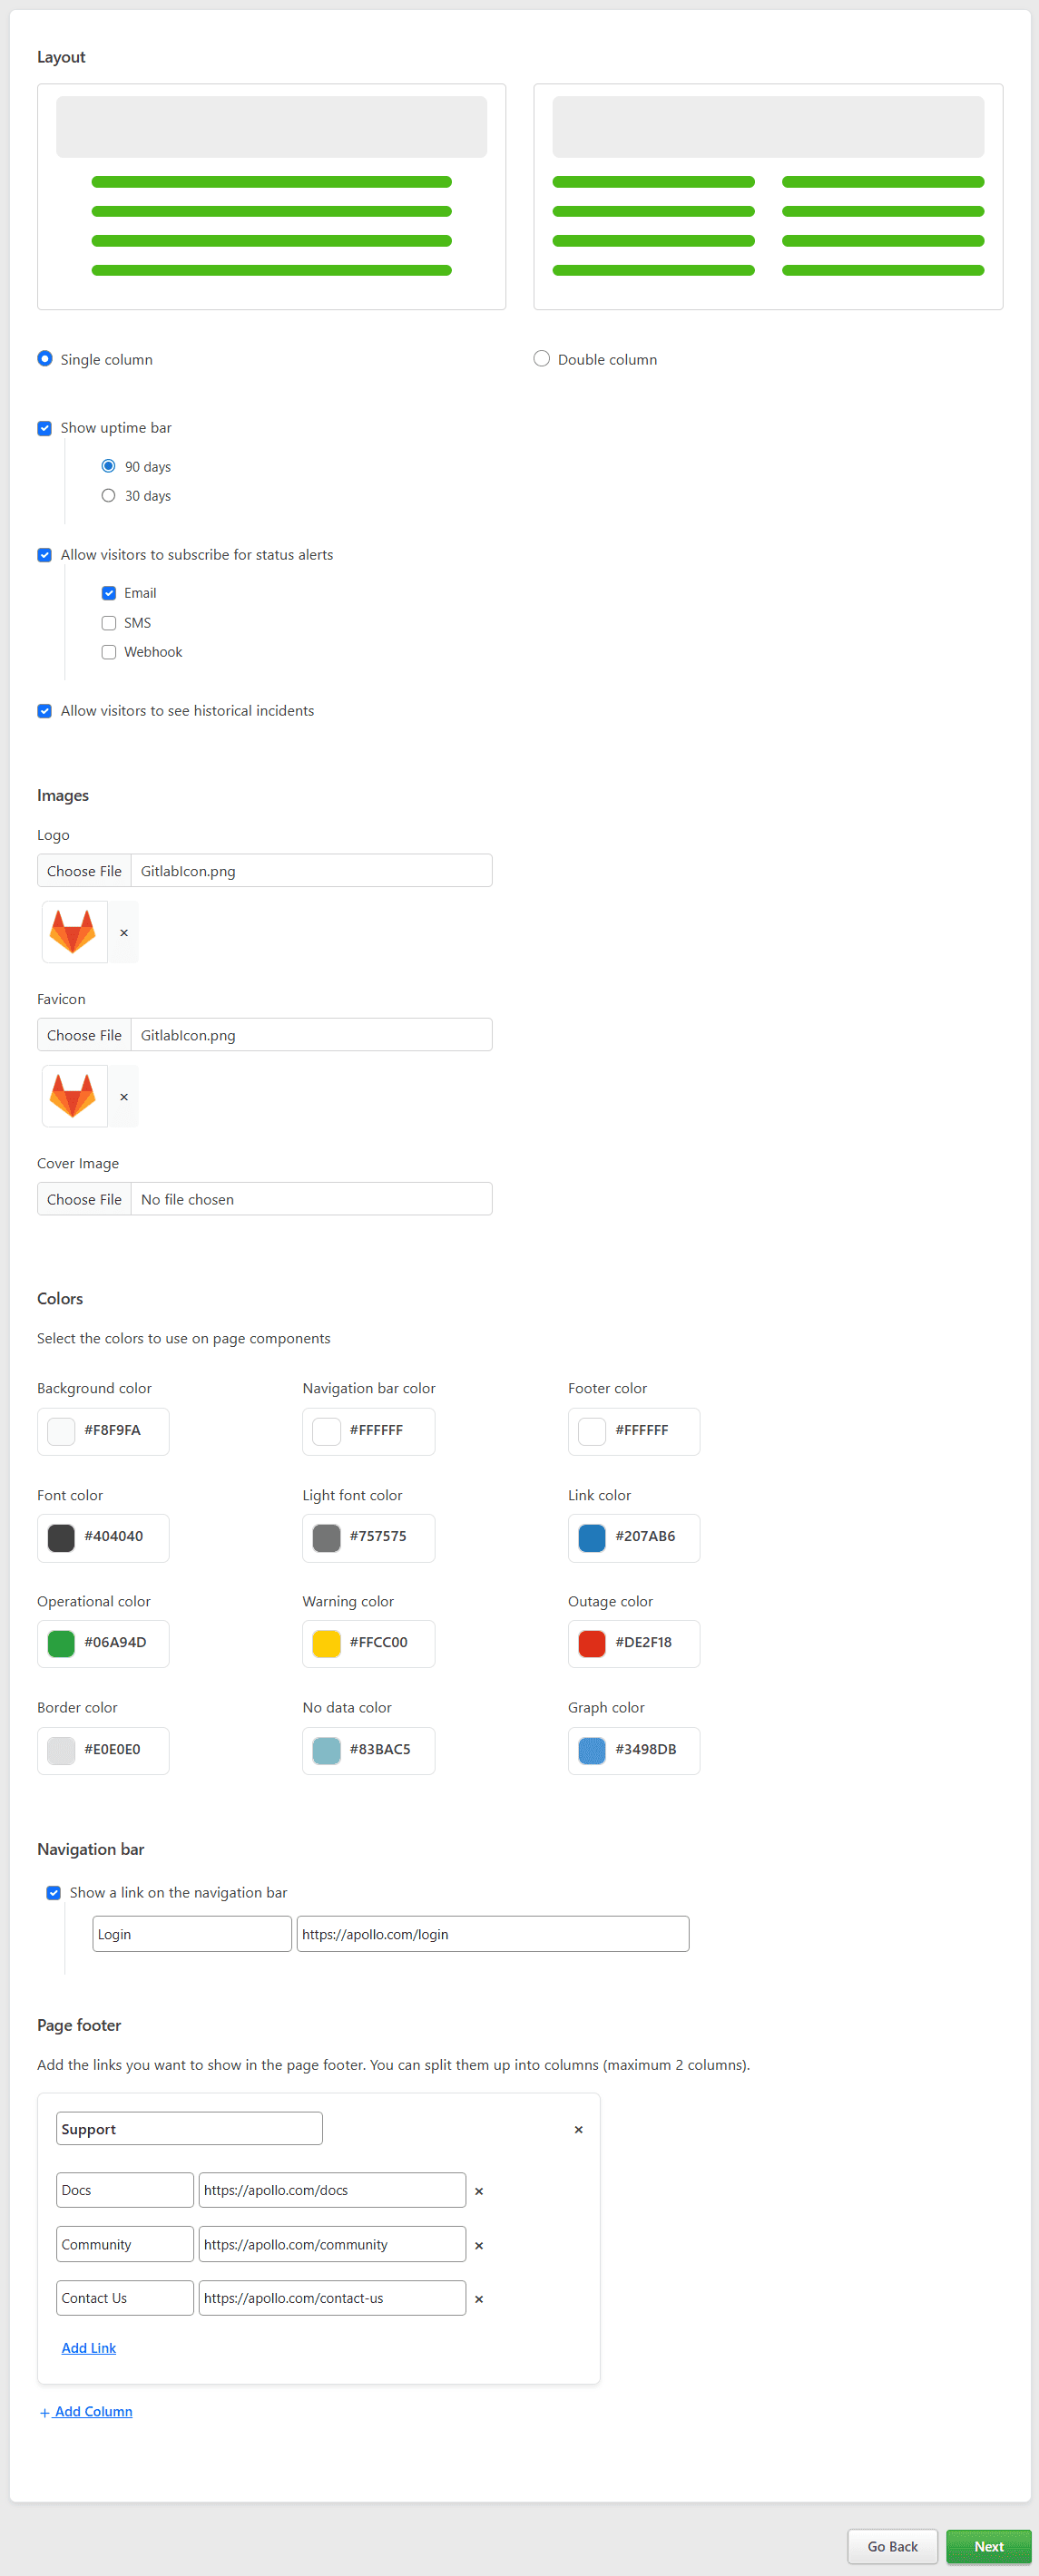
- Customize the page layout and design.
- Page layout: Select whether the business services will be displayed in a single column or be split into two columns.
- Uptime metrics: Decide if you want to show uptime metric bars for the business services and categories. You can choose the number of days of uptime metrics that should be shown.
- Subscription: Decide if you would like to allow your page visitors to automatically subscribe to updates from this page. You can select the types of subscriptions that will be allowed.
- Past incidents: While maintenances are shown by default on all status pages, you can decide whether you would like to allow your page visitors to see past incidents. If you choose this option, then a link will be added in the footer of the page from where past incidents can be viewed.
- Images: Upload your logo and favicon. If you want you can also add a cover image.
- Colors: Choose your own colors to give the page a feel that matches your organization's theme.
- Navigation bar: By default the navigation bar shows your organization's logo. If you select the option to allow page visitors to subscribe, then it will also show an option to subscribe. However, you can also add another URL, pointing to an external page to customize it even further. For example, this link could point to your login page or customer support page.
- Footer: The default footer consists of internal links pointing to current status, maintenance and past incidents (if allowed), but further columns can be added to the footer to reflect content that is more tailored to your site and resources.
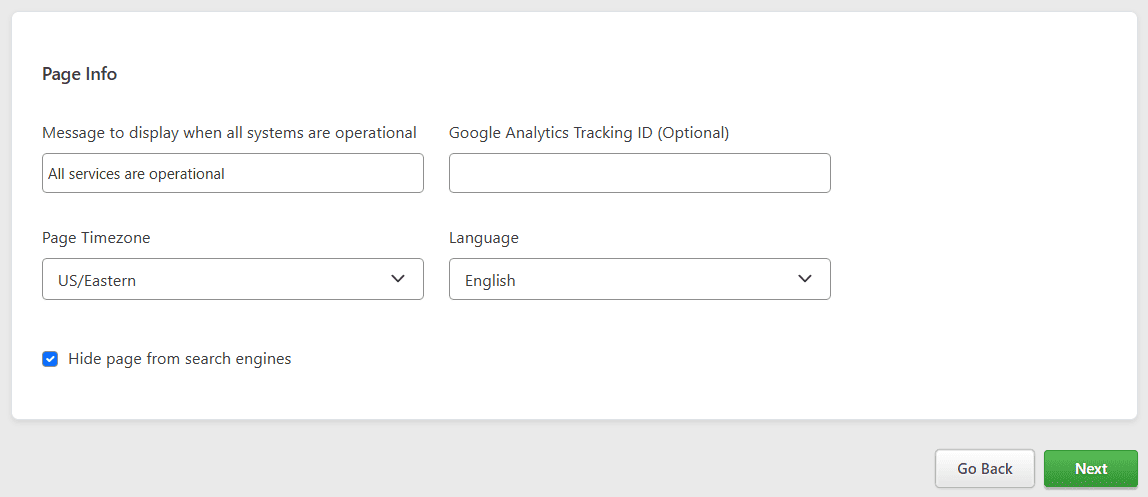
- Add page specific configurations.
- Operational message: Provide the message that should be shown when all services are operational.
- Google Analytics ID: (optional) If you would like to track your page's performance, you can provide your Google Analytics ID.
- Timezone: Select the timezone of the page.
- Language: Select the language of the page. At the moment, English and Spanish are supported.
- Hide from search engines: Select if the page should be hidden from search engines.
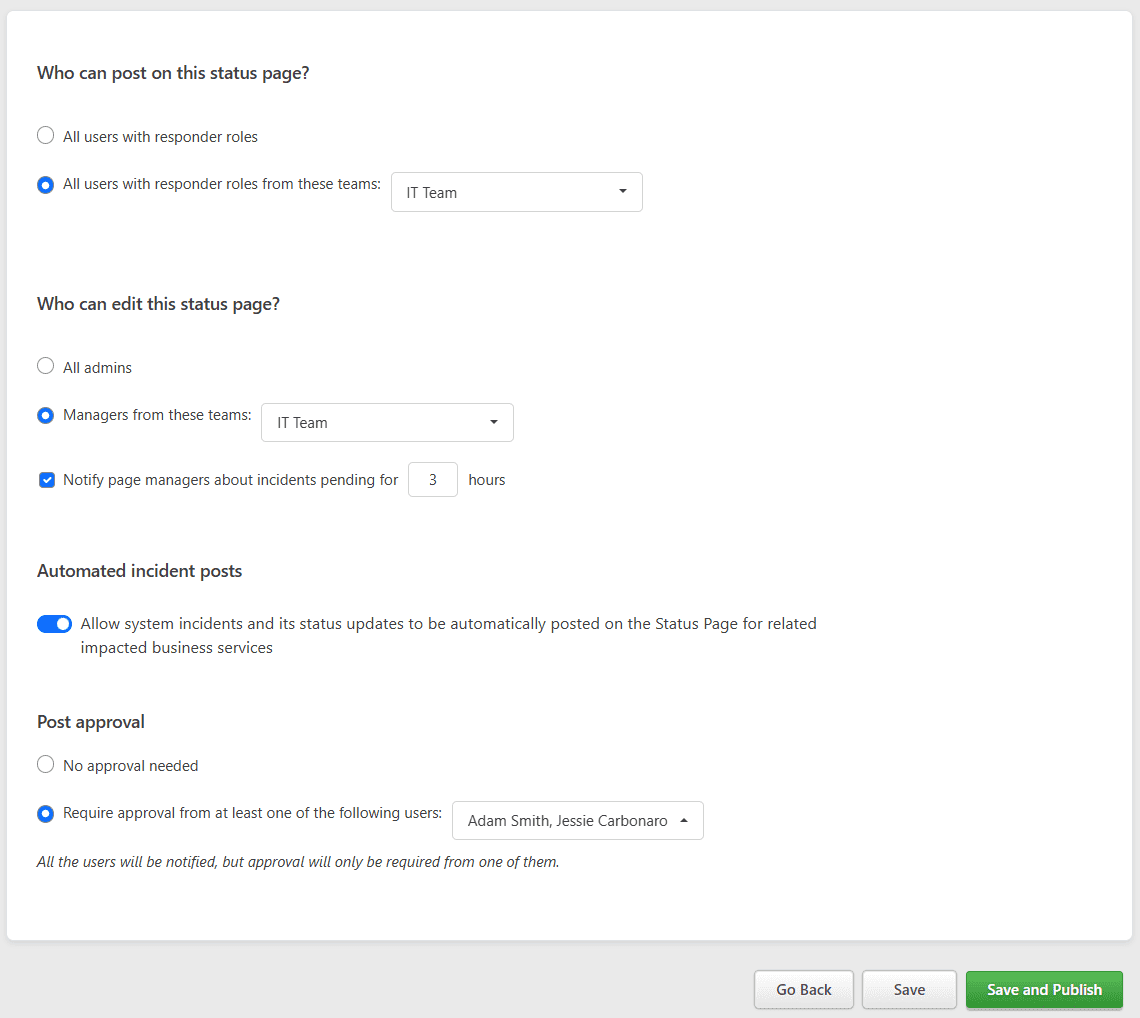
- Set post, edit and approval permissions for the page.
- Post permissions: Select the users (or teams if you have Teams permission) who will be allowed to post on the page.
- Edit permissions: Select the users (or teams if you have Teams permission) who can manage the page.
- Notify about pending incidents: Choose if you would like to be notified about posts on the page that are pending for a certain number of hours.
- Auto post: Choose if you would like system incidents to be automatically posted on the page. Only incidents that impact business services and have the minimum urgency needed for impact will be posted. Incidents that are automatically posted, will also be automatically updated as status updates are made and the system incident resolves.
- Post approval: Select if you would like posts to be reviewed by a user or (group of users) before they are posted. This also allows you to decouple automation with humans in the loop.
- Click Save or Save and Publish when you are done. If you do not choose to publish the page, it will not be available publicly although you will still be able to preview the draft.
Review Changes Before Publishing
You will not be able to preview the status page the first time you create it. However, once the status page is created, you can go into the page details and select Preview Page to see the changes as you work through them.
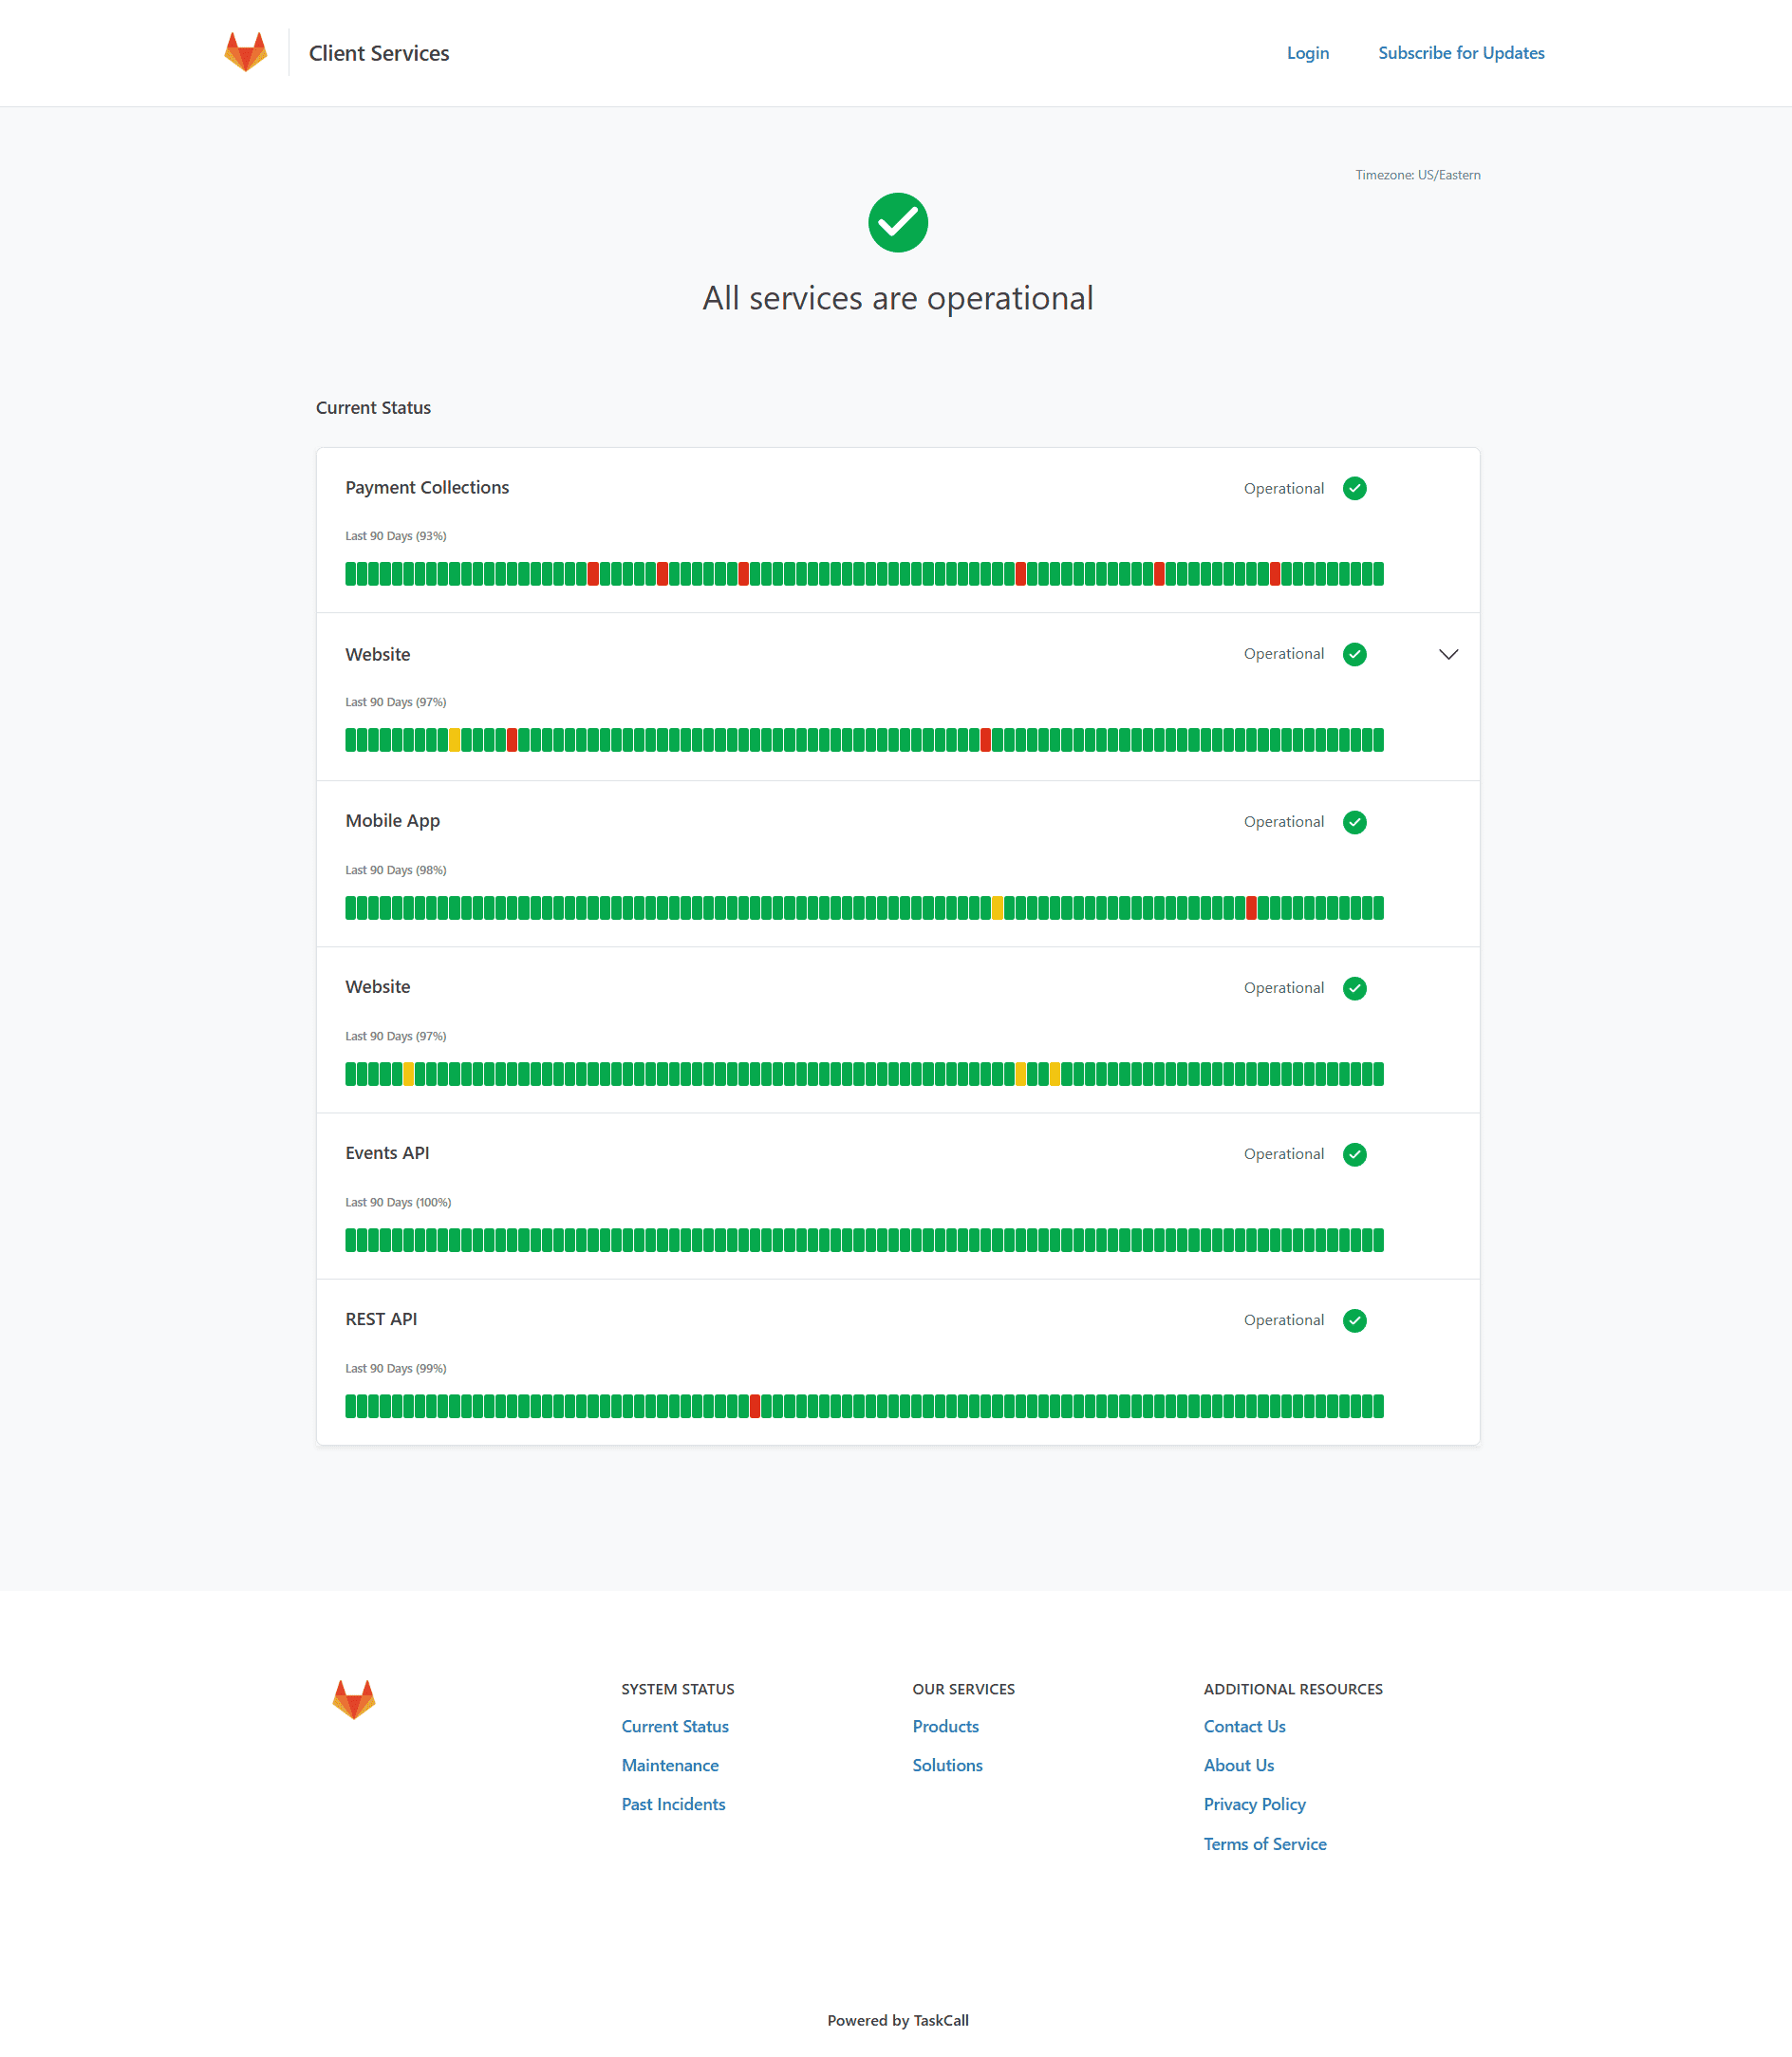
After the page is published, you can also see the live page by clicking View Live Page.
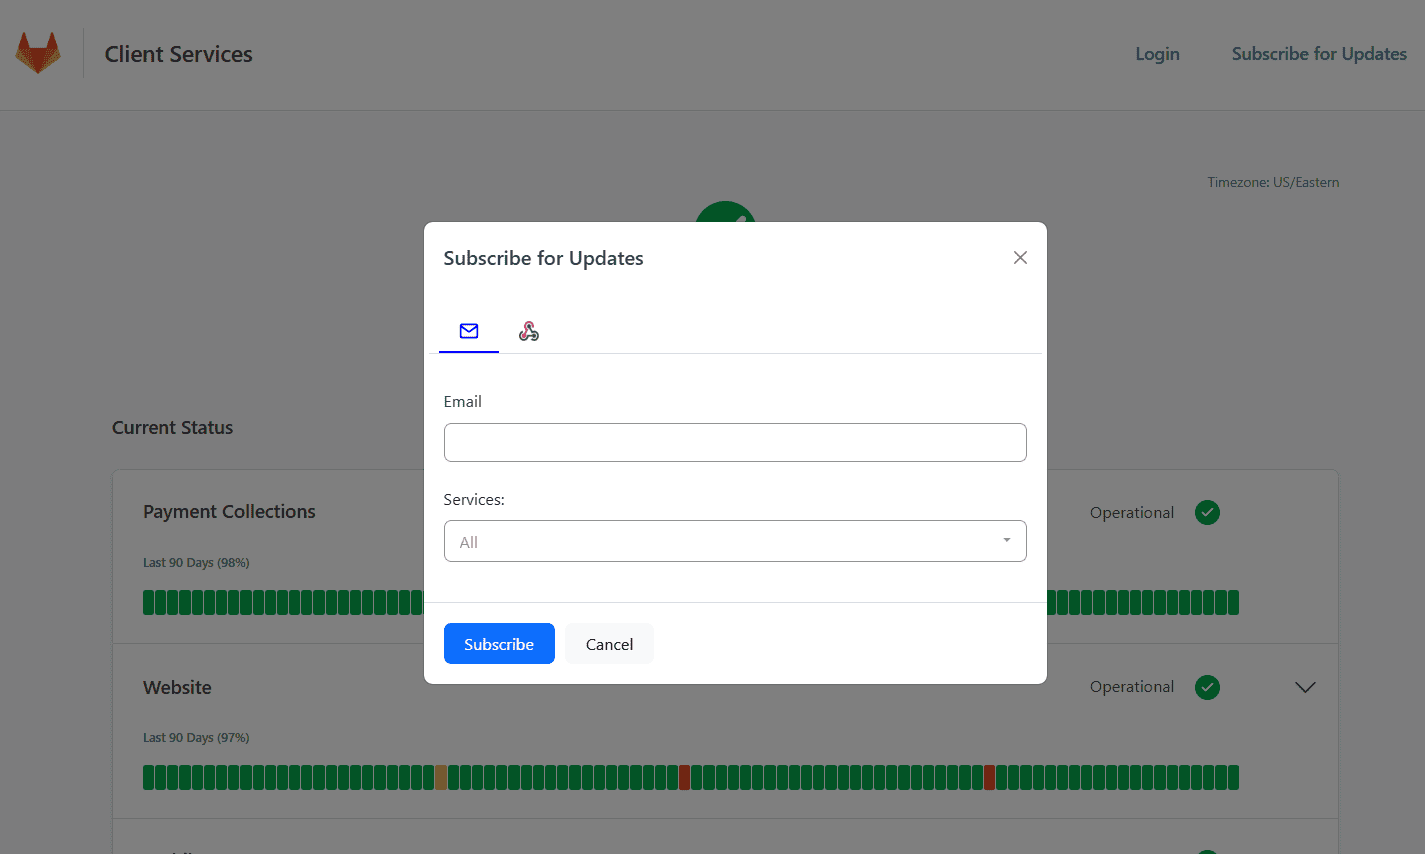
Subscribe for Updates
If self subscription is allowed, page visitors can subscribe for updates by themselves by clicking the Subscribe for Updates option from the navigation bar. They can enter their information and select the business services they would like to be notified about.
Subscription pointers:
- Notifications are sent out when any of the selected business services are impacted.
- Subscribers are only notified when page posts specifically state that subscribers should be notified.
- Subscribers must confirm their subscription before notifications can be sent out. They can also choose to opt out of these notifications if they like.