
Nagios Integration Guide
Nagios is a powerful monitoring system that allows organizations to identify system and networking problems. It has a large open source community who constantly contribute to the development of the system.
TaskCall's Nagios integration brings alerts triggered on Nagios from threshold breaches to be brought to the forefront. Use TaskCall's powerful incident response and management system to resolve incidents in real time. TaskCall's integration supports both Nagios Core (open source software) and Nagios XI (enterprise software).
Nagios requires organizations to set up their own Nagios server, and additional features can be added to the tool by installing plugins. In order to integrate with TaskCall, a plugin needs to be installed and some manual actions need to be taken. Please follow the steps detailed below carefully.
Pointers
- The integration happens between a TaskCall service and Nagios Core or Nagios XI.
- Incidents will automatically resolve in TaskCall when metrics fall back within the normal threshold.
- At the moment this integration only supports alerts to be received from Nagios to TaskCall.
In TaskCall
- Go to Configurations > Integrations and click New Integration.
- Select the Nagios integration.
- Give the integration a name and configure how incidents will be created. Only the Default Service field is required. The rest are optional.
- Incidents (Optional)
- TaskCall automatically maps incoming payloads with internal attributes to create incidents. However, this can be customized in the Incidents tab. Constant values can be included alongside placeholders to dictate which attributes should map to the Incident Title, Description, Tags, Snapshots and Vendor URL. To insert a placeholder use double curly braces.
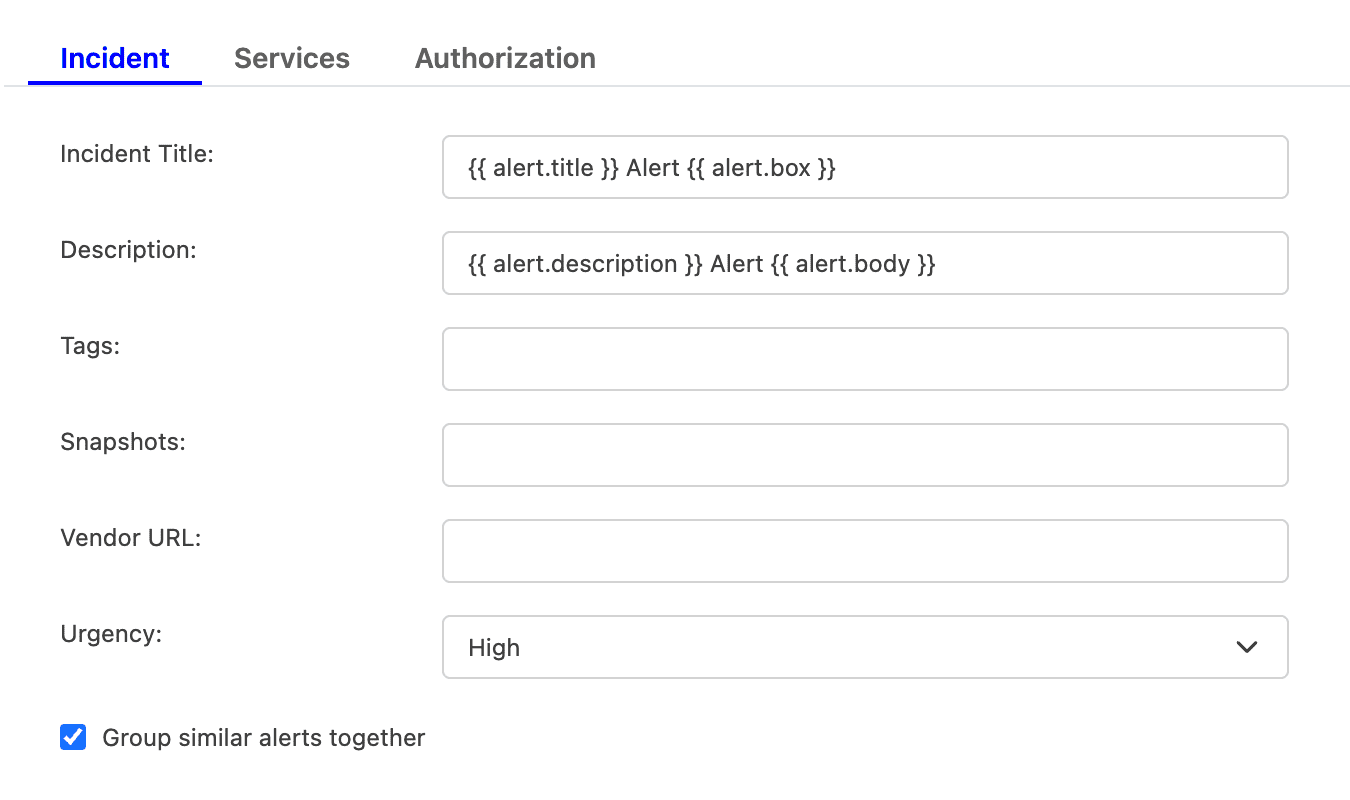
For example, if you enter {{ alert.title }} in the Incident Title field, TaskCall will look for an attribute called "title" nested inside another attribute called "alert" in the incoming payload. If the nested attribute exists, its corresponding value will be pulled from the payload and inserted. If the nested attribute does not resolve successfully, TaskCall will fall back to the default mapping.
If you are unsure, please leave the fields empty. TaskCall will use the default mapping to create the incident for you. - Select the Urgency level the incident should be created at.
- Select the option to Group similar alerts together if you would like follow up triggers from the same alert source to be grouped into the same incident. If you leave this option unchecked, then a new incident will be created for every trigger. (This behavior is specific to new triggers; not updates to an alert.)
- Click Next to move on to the Services tab.
- TaskCall automatically maps incoming payloads with internal attributes to create incidents. However, this can be customized in the Incidents tab. Constant values can be included alongside placeholders to dictate which attributes should map to the Incident Title, Description, Tags, Snapshots and Vendor URL. To insert a placeholder use double curly braces.
- Services (Required)
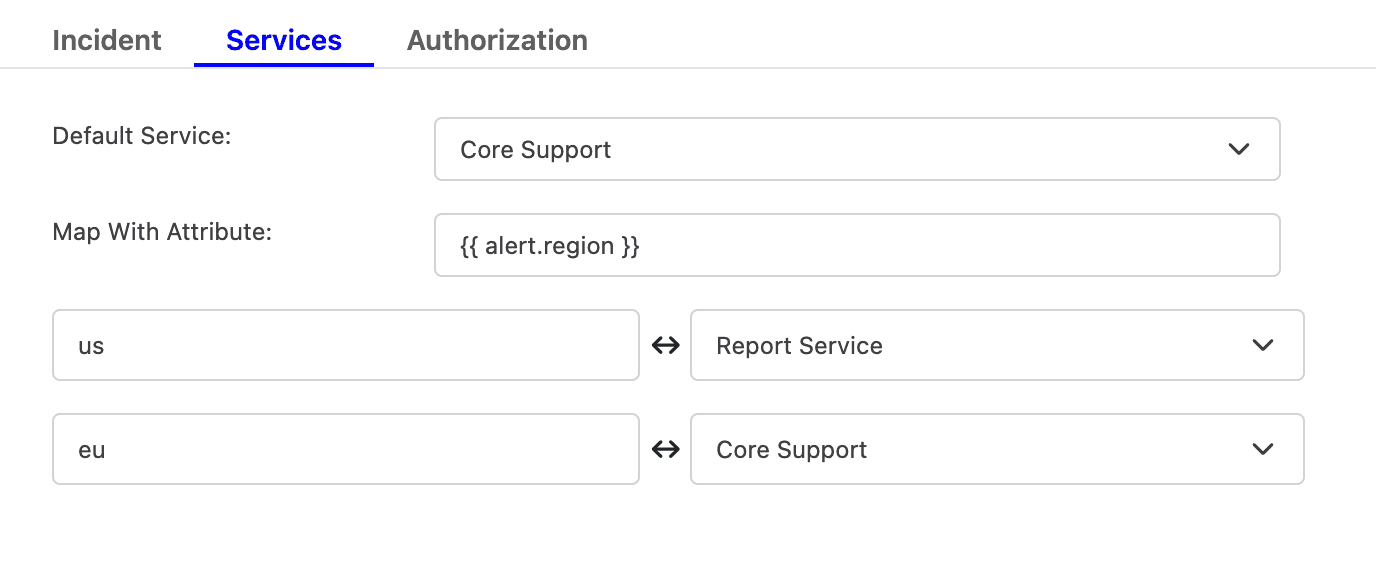
- Select the Default Service incidents should be sent to. To route incidents to different services instead, set Map With Attribute to the attribute to route by using a placeholder. Then, map each value it can take to the service that should receive it.
For example, to route by a region attribute sent in the payload, set Map With Attribute to {{ region }}, then map US to one service and EU to another, and so on.
- Click Next to move on to the Authorization tab.
- Select the Default Service incidents should be sent to. To route incidents to different services instead, set Map With Attribute to the attribute to route by using a placeholder. Then, map each value it can take to the service that should receive it.
- Authorization (Optional)
- The Authorization tab allows a Bearer Token and an IP Allowlist be added if you would like to restrict who is able to send alerts to this integration. If you are unsure, this can be skipped.
- Once done, click Save.
- Copy the Integration Url that is issued for the integration. This will be used to set up the notification in Nagios.
On Nagios Core/Nagios XI Server
- Install the TaskCall Nagios plugin.
curl -s https://api.github.com/repos/taskcallapp/taskcall-nagios/releases/latest | grep '"browser_download_url"' | sed -E 's/.*"([^"]+)".*/\1/' | wget -i-unzip -a taskcall-nagios.zip
- Give execute permission to primary script in TaskCall's plugin.
chmod +x taskcall-nagios/scripts/send_to_taskcall.py
- Nagios can send alerts to endpoints that it defines as contacts. The downloaded plugin contains the TaskCall contact that Nagios uses to send alerts to TaskCall. Some changes need to be made to this file.
Open /{installation path}/taskcall-nagios/taskcall_contact.cfg and replace the <INTEGRATION_KEY> placeholder with the integration key you copied from TaskCall earlier ({installation path} could be /home or whichever parent directory the plugin is installed in). Please ensure that the path to the script is also updated in case you installed the plugin in a different directory from /home.
...
define command {
command_name service-notification-to-taskcall
command_line /home/taskcall-nagios/scripts/send_to_taskcall.py -integKey="<INTEGRATION_KEY>" -entityType=service ... ...
}
define command {
command_name host-notification-to-taskcall
command_line /home/taskcall-nagios/scripts/send_to_taskcall.py -integKey="<INTEGRATION_KEY>" -entityType=host ... ...
}
- Now we need to copy this file to the objects folder in Nagios so it can have access to it.
cp /{installation path}/taskcall-nagios/taskcall_contact.cfg /usr/local/nagios/etc/objects
- We also need to let Nagios know where to look for this new contact. Open the Nagios configuration file from /usr/local/nagios/etc/nagios.cfg and the following line to the file.
cfg_file=/usr/local/nagios/etc/objects/taskcall_contact.cfg
- Now we need to let Nagios know that "taskcall" is a contact that it should send alerts to. We do this by adding "taskcall" as a contact in the main Nagios contacts file located in /usr/local/nagios/etc/objects/contacts.cfg .
...
define contactgroup {
contactgroup_name admins
alias Nagios Administrators
members taskcall
}
...
- Restart the Nagios server. You should start receiving alerts on TaskCall.