
New Relic Integration Guide
New Relic is a cloud service that allows the performance of websites and technical applications to be monitored. TaskCall's integration with New Relic allows alerts generated by policy breaches to be converted into incidents and gets the correct on-call responders to attend them in real-time. With TaskCall's New Relic integration enhance your system reliability and customer satisfaction.
Pointers
- The integration is between a TaskCall service and New Relic.
- Incidents will automatically resolve in TaskCall when metrics fall back within the normal threshold.
- Incidents will be acknowledged in TaskCall when they are acknowledged in New Relic.
- This integration only allows alerts to be received in TaskCall from New Relic.
In TaskCall
- Go to Configurations > Services. Select the service you want to integrate with.
- Once you are on the Service details page, go to the Integrations tab. Click on New Integration.
- Give the integration a name.
- From the integration types, select the top radio button indicating that you are trying to use a built-in integration.
- From the list of built-in integrations, select New Relic.
- Click Save.
- Copy the Integration Url that is issued for the integration.
In New Relic
In New Relic you will need to create a new destination and a workflow to ensure alerts are dispatched to TaskCall when certain policies are met.
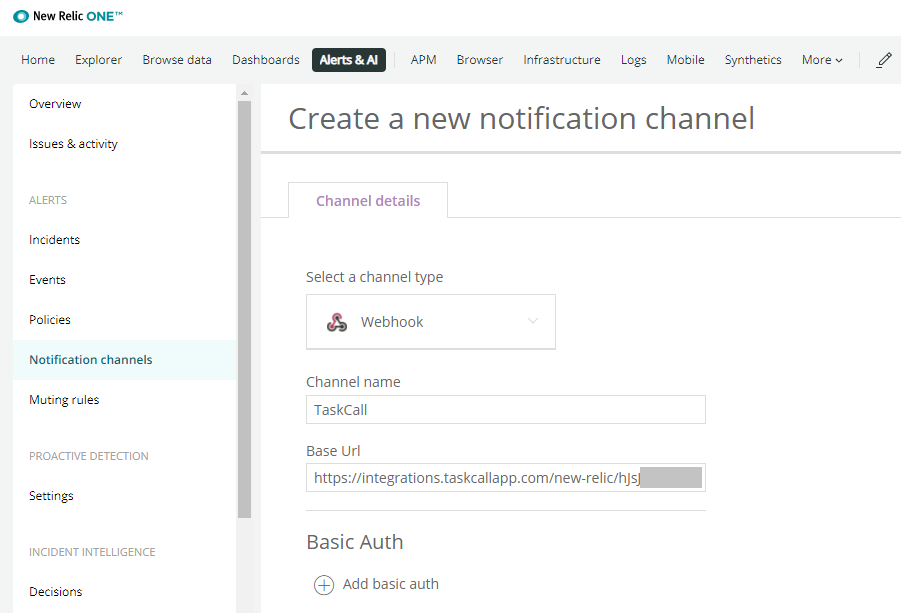
- Go to Alerts > Destinations. Add a new Webhook destination.
- Give the webhook a name and paste the integration url you copied over from TaskCall in the Endpoint URL field. No authorization is needed. Click Save Destination when you are done.
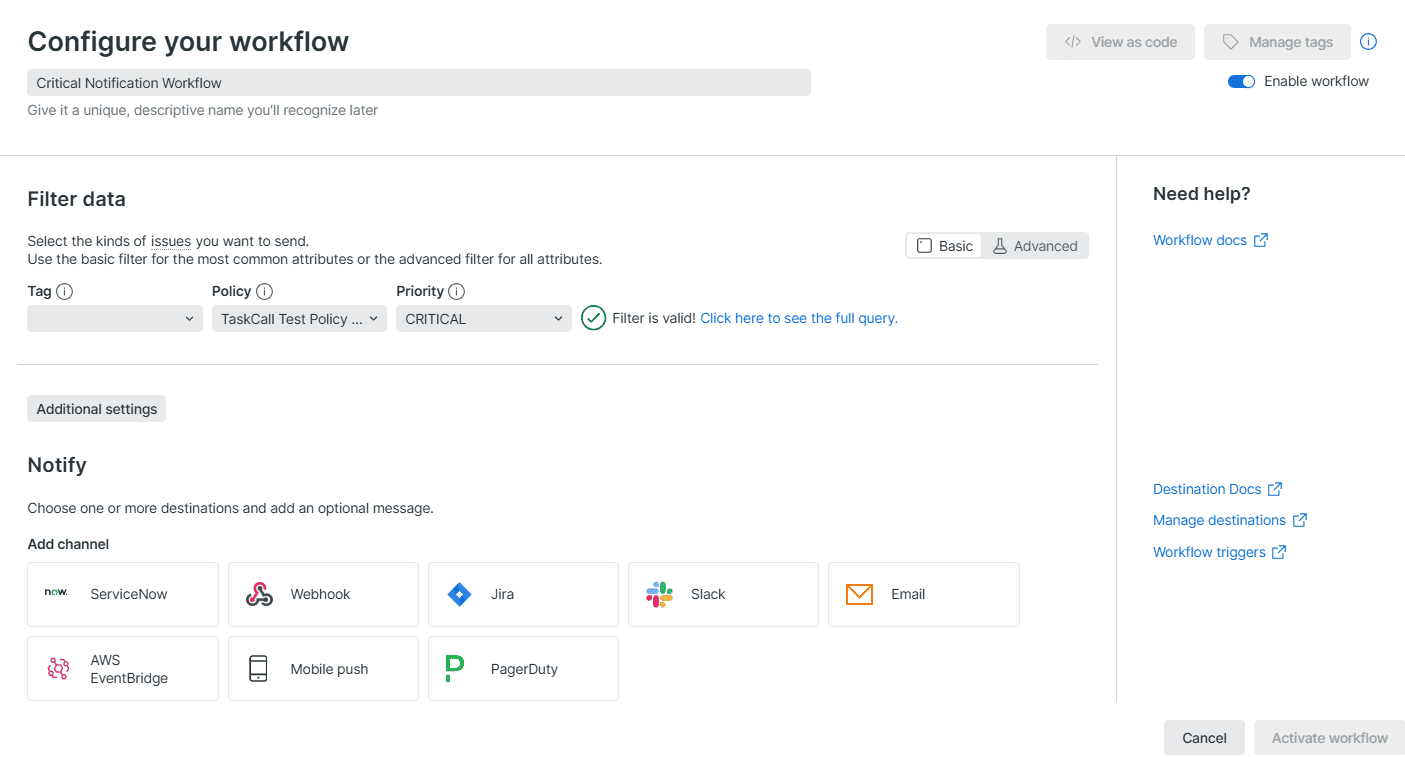
- Now go to Alerts > Workflows. Add a new workflow.
- Give the workflow a name. Select the policies for which this workflow should apply and the priority with which they will be sent. In the Notify section, select Webhook. This will open up another modal where you can define the notification destination and message.
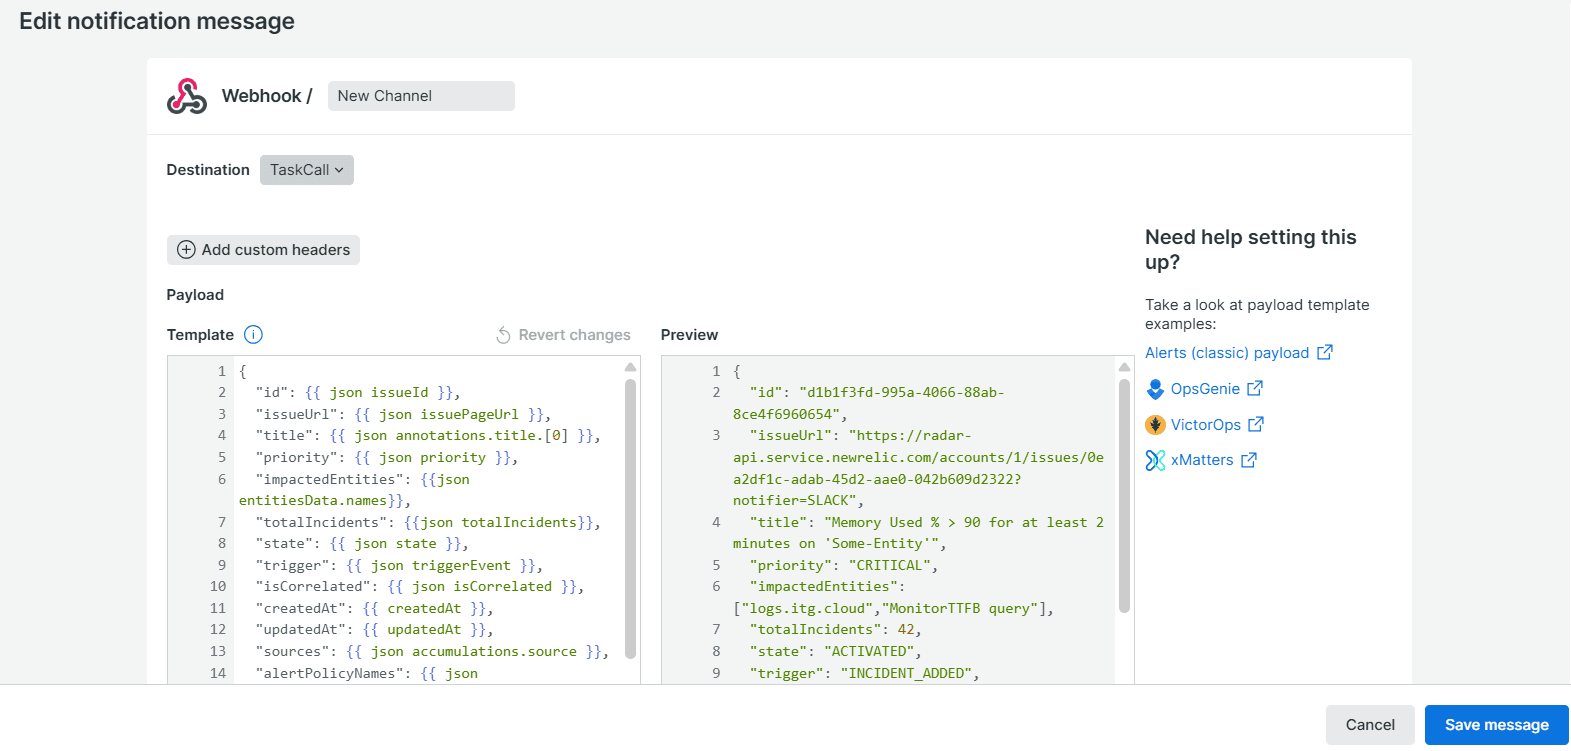
- In the notification modal, select the TaskCall destination you created earlier as the Destination for this notification. You can leave the body of the message to be the default template set by New Relic. If you want to customize it, please refer to the attributes TaskCall expects. When you are done, send a test notification to ensure the integration is working correctly. Click Save message when you are done.
- Click Activate workflow when you are done. That's it!
Alert Payload
TaskCall expects the following payload from New Relic. If a different payload is sent, TaskCall will still try to create an incident with it with the available data.
"id": {{ json issueId }},
"issueUrl": {{ json issuePageUrl }},
"title": {{ json annotations.title.[0] }},
"priority": {{ json priority }},
"impactedEntities": {{json entitiesData.names}},
"totalIncidents": {{json totalIncidents}},
"state": {{ json state }},
"trigger": {{ json triggerEvent }},
"isCorrelated": {{ json isCorrelated }},
"createdAt": {{ createdAt }},
"updatedAt": {{ updatedAt }},
"sources": {{ json accumulations.source }},
"alertPolicyNames": {{ json accumulations.policyName }},
"alertConditionNames": {{ json accumulations.conditionName }},
"workflowName": {{ json workflowName }}
}
Customize Incident Body
By default, TaskCall shows the JSON payload received from New Relic as the body of the incident. However, it can be customized by passing a details attribute in the payload. The details attribute can be a single value or it can be a key/value pair. The value will always be converted into a string upon receipt in TaskCall. Here is an example of how the details attribute can be used:
"createdAt": {{ createdAt }},
"sources": {{ json accumulations.source }},
"details": {
"impactedEntities": {{json entitiesData.names}},
"totalIncidents": {{ json totalIncidents}},
"alertPolicyNames": {{ json accumulations.policyName }}
},
"workflowName": {{ json workflowName }},
...